Silicone Application
A more complete analysis of Silicone construction steps! !
The construction process of Silicone is super simple, and the teaching of Silicone construction drawings can be understood at a glance, and you can learn it at one time. Silicone construction is easy to get started !
Preparations
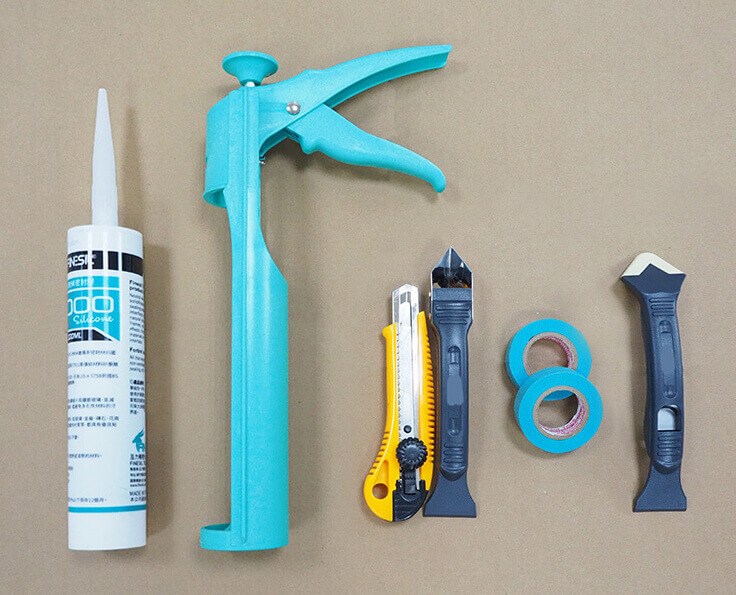
Silicone / silicone gun / box cutter / silicone spatula / spatula / masking tape
Silicone
Main force. Please go to our official website/Facebook fan page to ask us or serviceman in shops about how to apply silicone.Silicone gun
A wide variety of silicon guns are available in the market, with prices ranging from tens of dollars to more than 1,000 dollars. Basically, select a silicone gun that allows you to operate it easily after mounting silicone to it.Box cutter
The box cutter is used to remove old silicone but you have to pay attention to its material used to avoid scratches to the floor, etc.Product:
Non dripping silicone gun → Masking tape for applicaiton →
Step 1
Remove old silicone caulking with your box cutter or silicone spatula and clean the gaps.
Step 2
Cut off the silicone cartridge and properly cut a tip of the nozzle at an angle.
Step 3
Affix the masking tape to avoid contamination of the surrounding wall by excessive sealants.
Step 4
Spread silicone to the gaps.
Step 5
Finish off the silicone caulking using the spatula to ensure the sealant is evenly and aesthetically filled into gaps.
Step 6
Remove the masking tap and check if there are silicone residues to ensure the surroundings are clean.